Onigiri I
Onigiri I Recipe - Traditional Japanese Rice Balls with Bonito, Umeboshi, and Salmon
Introduction
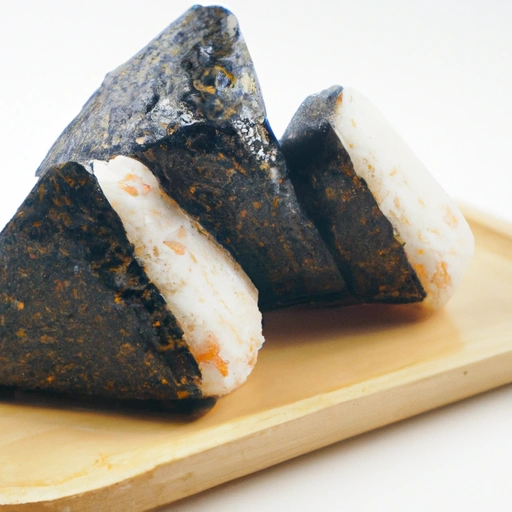
Onigiri, also known as Japanese rice balls, are a popular and convenient snack in Japan. These rice balls are typically filled with various ingredients such as salmon, seasoned plums, or bonito shavings, and are wrapped in seaweed. Onigiri are easy to make and can be enjoyed as a quick meal or snack on the go.
History
Onigiri has been a staple in Japanese cuisine for centuries. The origins of onigiri can be traced back to the 11th century when rice balls were used as portable food for warriors and travelers. Over time, onigiri evolved into a popular snack enjoyed by people of all ages in Japan.
Ingredients
How to prepare
- Rinse the salmon and pat it dry with a paper towel.
- Sprinkle the salmon with salt.
- Place the salmon on a rack over a cookie sheet or small dish and bake it in a 400°F (204°C) oven for an hour to dry it out.
- Cook the rice according to the package directions (i.e. without adding fat) so that it becomes sticky.
- Prepare three bowls.
- Once the salmon is done, ground the fillet up into small pieces with a fork or mortar and pestle and place it in the first bowl.
- Mash the seasoned plums with a fork and place them in the second bowl.
- Empty the contents of one small bonito shaving envelope into the third bowl.
- Divide the rice into three portions and add one portion to each bowl.
- Mix the ingredients lightly to combine with the seasoning.
- Slightly wet your hands.
- Dip one fingertip into the leftover salt and smear the salt so that it sticks to both hands.
- Take 0.25 of the rice mixture from the first bowl.
- Form the rice into a ball.
- Make the ball compact, but not so much that the grains of rice become mushy.
- Form the rice into a triangle, square, or cylinder shape.
- Repeat the process for the remaining rice.
- Each seasoning bowl should yield four rice balls, for a total of twelve.
- Place each rice ball on a piece of parchment paper to prevent sticking.
- Cut each sheet of nori into three strips lengthwise.
- Then cut each strip in half.
- Wrap one small strip of nori around the bottom of each rice ball to form an envelope to hold it.
- Serve the rice balls immediately.
- If you won't be serving them immediately, wait to wrap the rice in the nori, as it will absorb water from the rice and lose its crunchiness.
- Instead, wrap the rice balls tightly and refrigerate them.
- Let the rice balls come to room temperature before serving.
Variations
- Try filling the onigiri with tuna, pickled vegetables, or grilled chicken.
- Add furikake (Japanese rice seasoning) to the rice for extra flavor.
- Experiment with different shapes and sizes for a fun twist on traditional onigiri.
Cooking Tips & Tricks
Use Japanese short-grain rice for the best texture and stickiness.
- Make sure to rinse the rice thoroughly before cooking to remove excess starch.
- Season the fillings generously to add flavor to the rice balls.
- Wet your hands before shaping the rice balls to prevent sticking.
- Wrap the rice balls in nori just before serving to maintain its crunchiness.
Serving Suggestions
Onigiri can be served as a snack, appetizer, or light meal. Pair it with miso soup, pickled vegetables, or a side salad for a complete meal.
Cooking Techniques
Baking the salmon adds a smoky flavor to the rice balls.
- Mixing the rice with the fillings lightly ensures that the grains remain separate and fluffy.
- Wrapping the rice balls in nori adds a crunchy texture and umami flavor.
Ingredient Substitutions
Use cooked chicken or tofu as a substitute for salmon.
- Substitute pickled radishes or cucumbers for seasoned plums.
- Use furikake or sesame seeds instead of bonito shavings for seasoning.
Make Ahead Tips
Prepare the fillings and rice in advance and assemble the onigiri just before serving.
- Store the assembled onigiri in the refrigerator for up to 2 days.
Presentation Ideas
Arrange the onigiri on a platter with a variety of fillings for a colorful display. - Garnish the rice balls with sesame seeds, chopped scallions, or pickled ginger for added flavor.
Pairing Recommendations
Serve onigiri with green tea, sake, or Japanese beer for a traditional pairing.
- Pair with a side of edamame, tempura, or yakitori for a complete Japanese meal.
Storage and Reheating Instructions
Store leftover onigiri in an airtight container in the refrigerator for up to 2 days.
- To reheat, microwave the rice balls for 30 seconds or until warm.
Nutrition Information
Calories per serving
Each serving of onigiri contains approximately 200 calories.
Carbohydrates
Each serving of onigiri contains approximately 40 grams of carbohydrates.
Fats
Each serving of onigiri contains approximately 4 grams of fats.
Proteins
Each serving of onigiri contains approximately 6 grams of proteins.
Vitamins and minerals
Onigiri is a good source of vitamins and minerals, including vitamin B12, selenium, and phosphorus.
Alergens
Onigiri may contain allergens such as fish (salmon), soy (from bonito shavings), and seaweed.
Summary
Onigiri is a nutritious snack that provides a good balance of carbohydrates, fats, and proteins. It is also rich in vitamins and minerals, making it a healthy choice for a quick meal or snack.
Summary
Onigiri is a versatile and delicious snack that can be enjoyed at any time of the day. With a variety of fillings and seasonings to choose from, onigiri is a customizable dish that can be tailored to suit your taste preferences. Whether you're looking for a quick meal on the go or a light snack, onigiri is a satisfying and nutritious option that is sure to please.
How did I get this recipe?
I have a clear memory of the first time I discovered the recipe for Onigiri. It was during my travels through Japan, a country known for its delicious and diverse cuisine. I had always been a fan of Japanese food, but I had never attempted to make any of the dishes myself.
One day, while wandering through a bustling street market in Tokyo, I stumbled upon a small food stall selling Onigiri. The triangular rice balls were displayed beautifully, with various fillings such as salmon, pickled plum, and seaweed. The aroma that wafted from the stall was intoxicating, and I couldn't resist the temptation to try one.
As I took my first bite of the Onigiri, I was immediately struck by the simplicity and elegance of the dish. The combination of the fluffy rice, salty filling, and crisp seaweed was a revelation. I knew right then and there that I had to learn how to make Onigiri myself.
I approached the vendor and asked her if she would be willing to share her recipe with me. She smiled warmly and invited me to watch as she prepared a fresh batch of Onigiri. I watched intently as she shaped the rice into perfect triangles, filled them with savory ingredients, and wrapped them in seaweed.
After she had finished making the Onigiri, the vendor handed me one to try. It was just as delicious as the first one I had tasted, if not more so. I thanked her profusely and asked if she would be willing to teach me how to make Onigiri. She agreed, and we spent the afternoon together in her stall, making batch after batch of rice balls.
As we worked, the vendor shared with me the history of Onigiri and how it had become a staple of Japanese cuisine. She told me about the different fillings and variations of the dish, and I absorbed every bit of information she shared with me.
By the end of the day, I had mastered the art of making Onigiri. The vendor praised me for my quick learning and encouraged me to continue experimenting with different fillings and flavors. I left her stall that day feeling inspired and excited to share my newfound knowledge with others.
When I returned home from my travels, I wasted no time in making Onigiri for my family and friends. They were amazed by the dish and begged me to teach them how to make it themselves. I happily obliged, passing on the recipe and techniques I had learned from the kind vendor in Tokyo.
Over the years, I have continued to make Onigiri for my loved ones, each time adding my own twist to the traditional recipe. I have experimented with different fillings such as teriyaki chicken, spicy tuna, and even caramelized onions. Each variation has been met with rave reviews, and I am proud to say that Onigiri has become a beloved staple in my household.
I am grateful to the vendor who took the time to teach me how to make Onigiri that day in Tokyo. Her generosity and expertise have inspired me to continue my culinary adventures and share my love of Japanese cuisine with those around me. And every time I make Onigiri, I am transported back to that bustling street market, surrounded by the sights and smells of Japan. It is a memory that I will cherish forever.
Categories
| Cathy's Recipes | Japanese Appetizers | Japanese Meat Dishes | Japanese Recipes | Medium-grain Rice Recipes | Nori Recipes | Plum Recipes | Salmon Recipes |