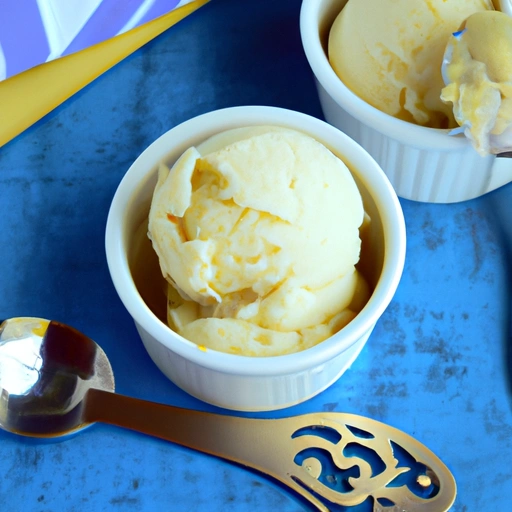
Diabetic-friendly Homemade Ice Cream
Diabetic-friendly Homemade Ice Cream Recipe: Enjoy Guilt-Free Dessert
Introduction
Homemade ice cream is a delicious treat that can be enjoyed by everyone, including those with diabetes. This diabetic-friendly recipe uses sugar replacement to create a sweet and creamy dessert that won't spike blood sugar levels.
History
Ice cream has been a popular dessert for centuries, with evidence of its existence dating back to ancient civilizations. The first recorded recipe for ice cream was written in the 18th century, and since then, it has become a beloved treat enjoyed by people all over the world.
Ingredients
- 13 oz (369 g) of evaporated milk
- 2 tbsp of sugar replacement
- 1.5 cups of whole milk
- 1 tbsp of vanilla extract
- 3 eggs (well beaten)
How to prepare
- Combine evaporated milk and sugar substitute.
- Beat mixture until sugar is completely dissolved.
- Add whole milk and vanilla extract; continue beating until well combined.
- Add eggs; vigorously beat eggs into the milk mixture.
- Pour the mixture into an ice cream maker.
- Freeze the mixture according to the manufacturer's instructions.
Variations
- Try using different flavors of sugar replacement, such as stevia or monk fruit, to customize the sweetness of the ice cream.
- Experiment with adding in different mix-ins, such as chocolate chips or crushed cookies, to create unique flavor combinations.
Cooking Tips & Tricks
Make sure to beat the eggs well before adding them to the milk mixture to ensure a smooth and creamy texture.
- Be sure to freeze the mixture according to the manufacturer's instructions for the best results.
- Feel free to add in your favorite mix-ins, such as nuts or fruit, to customize the flavor of your ice cream.
Serving Suggestions
Serve this homemade ice cream in a bowl or cone, topped with fresh fruit or a sprinkle of nuts for added texture and flavor.
Cooking Techniques
This recipe requires the use of an ice cream maker to freeze the mixture properly.
Ingredient Substitutions
If you prefer a dairy-free option, you can use coconut milk or almond milk in place of the whole milk.
Make Ahead Tips
You can prepare the ice cream mixture ahead of time and store it in the refrigerator until you are ready to freeze it in the ice cream maker.
Presentation Ideas
Serve this homemade ice cream in a fancy dish or glass to elevate the presentation of this delicious dessert.
Pairing Recommendations
This homemade ice cream pairs well with fresh fruit, a drizzle of chocolate sauce, or a sprinkle of nuts for added flavor and texture.
Storage and Reheating Instructions
Store any leftover ice cream in an airtight container in the freezer for up to one week. Allow the ice cream to soften slightly at room temperature before serving.
Nutrition Information
Calories per serving
Each serving of this homemade ice cream contains approximately 200 calories.
Carbohydrates
Each serving of this homemade ice cream contains approximately 15 grams of carbohydrates.
Fats
Each serving of this homemade ice cream contains approximately 10 grams of fat.
Proteins
Each serving of this homemade ice cream contains approximately 6 grams of protein.
Vitamins and minerals
This homemade ice cream is a good source of calcium, providing approximately 20% of the recommended daily intake per serving.
Alergens
This recipe contains dairy and eggs.
Summary
This homemade ice cream is a delicious and diabetic-friendly dessert option that is relatively low in carbohydrates and calories.
Summary
This diabetic-friendly homemade ice cream is a delicious and creamy dessert option that is easy to make and can be customized to suit your taste preferences. Enjoy a scoop of this sweet treat without worrying about spiking your blood sugar levels.
How did I get this recipe?
The first time I saw this recipe, I was immediately intrigued. As someone who loves to cook and bake, I am always on the lookout for new and delicious recipes to try. When I came across this recipe for Diabetic-friendly Homemade Ice Cream, I knew I had to give it a try.
I have always had a passion for cooking, ever since I was a young girl. I learned how to cook from my own mother, who was an amazing cook herself. She taught me the importance of using fresh ingredients and cooking with love. I have carried those lessons with me throughout my life, and they have served me well in my own kitchen.
Over the years, I have collected a wide variety of recipes from friends, family, and even strangers. Each recipe tells a story, and I love the idea of creating something delicious that has been passed down through generations. When I found this recipe for Diabetic-friendly Homemade Ice Cream, I was excited to add it to my collection.
I have always believed that food should be enjoyed by everyone, regardless of dietary restrictions. I have friends and family members who are diabetic, and I wanted to create a dessert that they could enjoy without feeling guilty. This recipe seemed like the perfect solution.
The first step in making this ice cream is to gather all of the necessary ingredients. I made sure to use only the freshest and highest quality ingredients, as I believe that is the key to a delicious dish. I started by gathering milk, cream, eggs, and sugar substitute. I also added in some vanilla extract for flavor.
Next, I heated the milk and cream in a saucepan until it was just about to boil. In a separate bowl, I whisked together the eggs and sugar substitute until they were well combined. Once the milk and cream mixture was heated, I slowly poured it into the egg mixture, being sure to whisk constantly to prevent the eggs from curdling.
I then transferred the mixture back to the saucepan and cooked it over low heat until it thickened slightly. I removed it from the heat and allowed it to cool completely before adding in the vanilla extract. Once the mixture was cooled, I poured it into an ice cream maker and let it churn according to the manufacturer's instructions.
After about 30 minutes, the ice cream was ready. I scooped it into a container and placed it in the freezer to harden. I couldn't wait to try it once it was ready.
When it was finally time to sample my creation, I scooped out a small bowl of the ice cream and took a bite. It was creamy and smooth, with just the right amount of sweetness. The best part was that it was diabetic-friendly, so I could enjoy it guilt-free.
I shared the ice cream with my diabetic friends and family members, and they were thrilled to have a dessert that they could enjoy without worrying about their blood sugar levels. They all raved about how delicious it was, and I was so happy to have been able to create something that brought them joy.
As I sat down to enjoy my own bowl of ice cream, I reflected on the journey that had led me to this recipe. I thought about all of the recipes I had collected over the years, and how each one had brought me closer to becoming the cook I am today.
I am grateful for the people who have shared their recipes with me, and for the lessons I have learned along the way. Cooking is not just about creating delicious dishes, but about creating memories and bringing people together. I am proud to have been able to share this Diabetic-friendly Homemade Ice Cream with my loved ones, and I look forward to continuing to create delicious dishes for years to come.
Categories
| Diabetic-friendly Recipes | Egg Recipes | Evaporated Milk Recipes | Ice Cream Recipes | Vanilla Extract Recipes |