Classic Baby Back Ribs
Baby Back Ribs Recipe - Authentic American Cuisine
Introduction
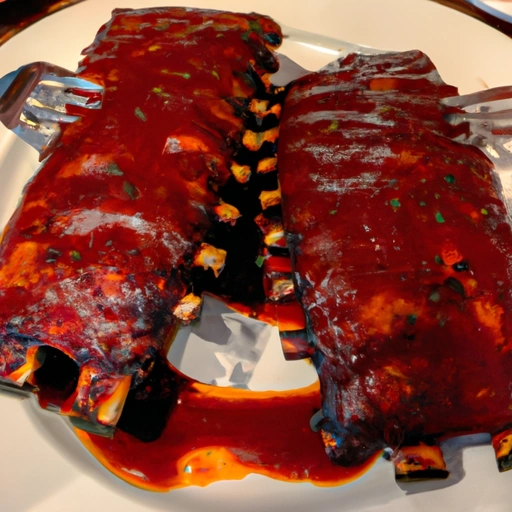
Baby back ribs are a classic and delicious dish that is perfect for a summer barbecue or a cozy winter meal. The combination of tender meat and flavorful sauce makes these ribs a favorite for many people. In this recipe, we will show you how to make the perfect baby back ribs that are sure to impress your family and friends.
History
Baby back ribs have been a popular dish in the United States for many years. The term "baby back" refers to the location of the ribs on the pig, specifically the upper part of the rib cage, near the spine. These ribs are known for being tender and flavorful, making them a favorite for barbecue enthusiasts.
Ingredients
For the meat and the rubbing base
- 2 tbsp kosher salt
- 2 tbsp paprika
- 4 tsp granulated garlic
- 4 tsp pure chili powder
- 2 tsp freshly ground black pepper
- 1 tsp ground cumin
- 4 racks baby back ribs, each about 2 lb (907 g)
For the sauce
- 0.75 cup unsweetened apple juice
- 0.5 cup ketchup
- 3 tbsp cider vinegar
- 2 tsp soy sauce
- 1 tsp worcestershire sauce
- 1 tsp molasses
- 0.5 tsp pure chili powder
- 0.5 tsp granulated garlic
- 0.25 tsp freshly ground black pepper
For basting/mopping
- 1 cup unsweetened apple juice
- 3 tbsp cider vinegar
- 2 tbsp unsalted butter
- 2 tbsp barbecue sauce
How to prepare
- In a small bowl, mix the rub ingredients.
- Using a dull knife, slide the tip under the membrane covering the back of each rack of ribs. Lift and loosen the membrane until it breaks, then grab a corner of it with a paper towel and pull it off.
- Season the racks all over, putting more of the rub on the meaty sides than the bone sides. Arrange the racks in a rib rack, with all the racks facing the same direction. Allow the racks to stand at room temperature for about 30 minutes, or until the surface looks moist, before grilling.
- Fill a chimney starter to the rim with charcoal and burn the charcoal until it is lightly covered with ash. Spread the charcoal in a tightly packed, single layer across one-third of the charcoal grate.
- Place a large disposable drip pan on the empty side of the charcoal grate. Fill the pan about halfway with warm water. Let the coals burn down to low heat (250° to 300° F). Leave all the vents open.
- When the fire has burned down to low heat, add two hickory wood chunks to the charcoal. Put the cooking grate in place.
- Place the rib rack over indirect, low heat (over the drip pan) as far from the coals as possible, with the bone sides facing toward the charcoal. Close the lid.
- Close the top vent about halfway. Let the racks cook for 1 hour.
- During that time, maintain the temperature between 250° to 300° F by opening and closing the top vent. Meanwhile, make the sauce and the mop.
- In a small saucepan, mix the barbecue sauce ingredients. Simmer for a few minutes over medium heat, and then remove the saucepan from the heat.
- In another small saucepan, mix the basting/mop ingredients. Simmer for a few minutes over medium heat to melt the butter, and then remove the saucepan from the heat.
- After the first hour of cooking, add 8 to 10 unlit charcoal briquettes and the remaining two wood chunks to the fire. At the same time, lightly baste the racks with some of the mop.
- Leaving the lid off for a few minutes while you baste the ribs will help the new briquettes to light. Close the lid and cook for another hour. During that time, maintain the temperature of the grill between 250° to 300° F by opening and closing the top vent.
- After 2 hours of cooking, add 8 to 10 unlit charcoal briquettes to the fire. Remove the racks from the rib rack, spread them out on a clean work area, and baste them thoroughly with some mop.
- Put them back in the rib rack, again all facing the same direction, but this time turned over so that the ends facing down earlier are now facing up. Also, position any racks that appear to be cooking faster than others toward the back of the rib rack, farthest from the charcoal.
- Let the ribs cook for a third hour. During that time, maintain the temperature between 250° to 300°F (149°C) by opening and closing the top vent.
- After 3 hours of cooking, check if any rack is ready to come off the grill. They are done when the meat has shrunk back from most of the bones by 0.25 inch or more.
- When you lift a rack by picking up one end with tongs, bone side up, the rack should bend in the middle and the meat should tear easily. If the meat does not tear easily, continue to cook the racks.
- The total cooking time could be anywhere between 3 to 4 hours. Not all racks will cook in the same amount of time. Lightly brush the cooked racks with some sauce and, if desired for crispiness, cook them over direct heat for a few minutes.
- Transfer to a sheet pan and tightly cover with aluminum foil. Let rest for 10 to 15 minutes before serving. Serve warm with the remaining sauce on the side as well as over rice.
Variations
- You can customize the rub and sauce to your liking by adding different spices or adjusting the sweetness or heat level.
Cooking Tips & Tricks
Make sure to remove the membrane from the back of the ribs before seasoning. This will help the seasonings penetrate the meat and make for a more tender rib.
- Maintaining a consistent temperature on the grill is key to cooking the ribs evenly. Use a thermometer to monitor the heat and adjust the vents as needed.
- Basting the ribs with a mop sauce throughout the cooking process will help keep them moist and add flavor.
- Let the ribs rest for a few minutes before serving to allow the juices to redistribute and the meat to relax.
Serving Suggestions
Serve the baby back ribs with coleslaw, cornbread, and baked beans for a classic barbecue meal.
Cooking Techniques
This recipe uses indirect grilling to cook the ribs low and slow, resulting in tender and flavorful meat.
Ingredient Substitutions
You can use a different type of vinegar or sweetener in the sauce if desired.
Make Ahead Tips
You can prepare the rub and sauce ahead of time and store them in the refrigerator until ready to use.
Presentation Ideas
Serve the ribs on a platter with a garnish of fresh herbs and a side of barbecue sauce for dipping.
Pairing Recommendations
Pair the baby back ribs with a cold beer or a glass of red wine for a delicious meal.
Storage and Reheating Instructions
Store any leftover ribs in an airtight container in the refrigerator for up to 3 days. Reheat in the oven or on the grill until heated through.
Nutrition Information
Calories per serving
350 per serving
Carbohydrates
15g per serving
Fats
20g per serving
Proteins
30g per serving
Vitamins and minerals
This dish is a good source of iron and vitamin B12.
Alergens
This recipe contains soy and gluten.
Summary
This dish is high in protein and moderate in fats and carbohydrates. It is a good source of iron and vitamin B12.
Summary
Baby back ribs are a classic and delicious dish that is perfect for any occasion. With the right seasonings and cooking techniques, you can create tender and flavorful ribs that are sure to impress your guests. Enjoy!
How did I get this recipe?
The memory of discovering this recipe for the first time is a joyful one. It was a warm summer day, and I had invited my dear friend Martha over for a barbecue in our backyard. Little did I know that Martha would bring with her the most delicious recipe for Classic Baby Back Ribs that I had ever tasted.
Martha had learned the recipe from her mother, who had learned it from her grandmother, and so on. It was a family recipe that had been passed down through the generations, and I was honored that Martha chose to share it with me.
As we sat outside, sipping on lemonade and catching up on old times, Martha began to prepare the ribs. She showed me how to marinate them in a delicious blend of spices and herbs, and how to cook them low and slow on the grill until they were tender and juicy.
The aroma of the ribs cooking wafted through the air, making my mouth water in anticipation. When they were finally ready, Martha plated them up and we sat down to enjoy our meal.
The first bite was heaven. The ribs were perfectly seasoned, with just the right amount of smokiness and sweetness. The meat fell off the bone, melting in my mouth with every bite. I had never tasted anything so delicious in my life.
After that day, I knew that I had to learn how to make these ribs for myself. I begged Martha to teach me her family recipe, and she graciously agreed.
Over the years, I have made these Classic Baby Back Ribs countless times. I have shared the recipe with friends and family, who have all raved about how delicious they are. Every time I make them, I am transported back to that warm summer day when Martha first introduced me to this culinary masterpiece.
I have tweaked the recipe slightly over the years, adding my own special touch here and there. I like to experiment with different spices and sauces, always trying to improve upon perfection.
But no matter how many times I make these ribs, they always bring me back to that moment when I first discovered the recipe. They remind me of the joy of cooking and sharing delicious food with the people I love.
And so, as I sit here now, preparing to make these Classic Baby Back Ribs once again, I am filled with gratitude for Martha and her family recipe. I am grateful for the memories it has given me, and for the joy it continues to bring to my kitchen.
As I take the first bite of the perfectly cooked ribs, I close my eyes and savor the flavor. And in that moment, I am content. For I know that no matter where life takes me, I will always have this recipe to bring me back to a place of happiness and love.
Categories
| American Recipes | Apple Juice Recipes | Barbecue Recipes | Barbecue Sauce Recipes | Black Pepper Recipes | Butter Recipes | Chili Powder Recipes | Cider Vinegar Recipes | Condiment Recipes | Cumin Recipes | Dinner Recipes | Fruit Juice Recipes | Garlic Recipes | Herb And Spice Mix Recipes | Herb Recipes | Ketchup Recipes | Lunch Recipes | Main Dish Meat Recipes | Main Dish Recipes | Meat Recipes | Molasses Recipes | Paprika Recipes | Pork Recipes | Prepared Barbecue Sauce Recipes | Soy Sauce Recipes | Spice Recipes |