Basic Lavash
Armenian Lavash Recipe - Simple and Delicious
Introduction
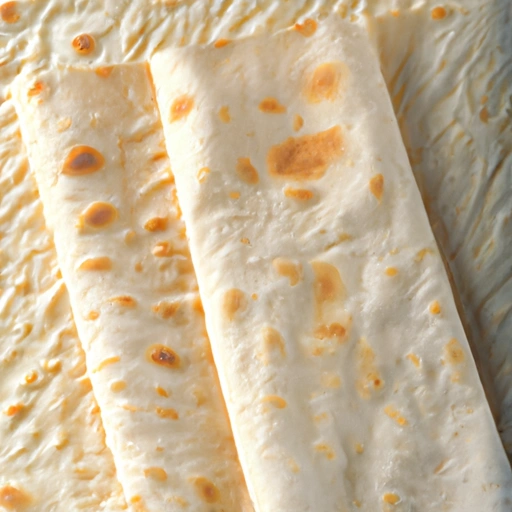
Lavash is a traditional flatbread that has been a staple in many cultures, particularly in the Middle East and the Caucasus region. This basic Lavash recipe offers a simple yet delicious way to make this versatile bread at home. With its soft texture and subtle flavor, Lavash can complement a wide range of dishes, from savory to sweet. Whether you're a seasoned baker or new to the kitchen, this recipe will guide you through the process of creating authentic Lavash bread.
History
Lavash has a rich history that dates back thousands of years. It is believed to have originated in Armenia, where it is considered a national dish, but it has also been widely adopted and adapted across the Middle East and neighboring regions. Traditionally, Lavash was baked in a tonir, an underground clay oven. This method of baking gave the bread its distinctive texture and flavor. Over time, the recipe and baking techniques have evolved, allowing for Lavash to be prepared in modern kitchens around the world.
Ingredients
- 1 package of yeast
- 2 cups of warm water
- 2 tbsp of sugar
- 5.5 cups of all purpose flour
- 2 tsp of salt
How to prepare
- Lightly oil a bowl for the dough. Mix the yeast, water, and sugar in a large mixing bowl.
- Add the flour and salt and mix until it forms a well-blended but somewhat soft dough.
- Knead the dough by hand or machine. If kneading by hand, turn it out onto a floured board and work it until it is smooth and elastic, approximately 10 minutes.
- If using a dough hook on an electric mixer, knead the dough at the slowest speed for about 5 minutes.
- Pat the dough into a ball and place it in the oiled bowl.
- Cover the dough with a kitchen towel and set it in a warm, draft-free place to rise until it has doubled in size, about 30 to 40 minutes.
- Once the dough has doubled, turn it out onto a floured board, punch it down, and knead it again until there are no air bubbles left.
- Divide the dough into 8 round mounds, place them on the board, cover again with a towel, and let them rise until almost doubled in size, about 30 minutes.
- While the dough is rising, preheat the oven to 450°F (232°C).
- Position a rack as close as possible to the bottom of the oven. Flour a 12x15-inch baking sheet.
- When the 8 mounds of dough have risen, roll them out one piece at a time into rectangles about 12x15 inches and about as thin as a pizza crust.
- Puncture the entire surface at 0.5-inch intervals with the tines of a roasting fork.
- Bake the breads, one at a time, for 6 to 8 minutes, or until the tops are lightly browned.
- Remove each finished bread to a wire rack to cool and continue baking the remaining breads until all 8 are finished.
- During the baking process, if any large bubbles start to puff up, puncture them immediately with a fork.
- The bread in the Middle East is traditionally a type of cracker bread called Lavash (Lawasha in Assyrian).
- This flat leavened bread is available in grocery stores and specialty markets and can be eaten as a cracker in its dry, crisp form.
- However, to serve it along with a meal, it is preferable to dampen it so that it becomes more bread-like.
- Moisten the lavash, one cracker at a time, under cold running water, making sure that both sides are completely wet. Place it in a plastic bag for 3 hours, at the end of which time the bread will be pliable and chewy.
- Lavash prepared in this fashion is also used for Aram sandwiches.
- In the old country, a lavash bread would bake in a clay-bottomed oven in 2 to 3 minutes.
- You can achieve a similar result by baking on a ceramic baking tile or directly on the floor of a gas oven.
Variations
- Whole Wheat Lavash: Substitute half of the all-purpose flour with whole wheat flour for a nuttier flavor and additional fiber.
- Herb Lavash: Add 1 tablespoon of dried herbs, such as thyme or rosemary, to the dough for an aromatic twist.
- Sesame Lavash: Sprinkle sesame seeds over the rolled-out dough before baking for a crunchy texture and rich flavor.
Cooking Tips & Tricks
To achieve the best results when making Lavash, consider the following tips and tricks:
- Ensure the water is warm (not hot) to activate the yeast properly without killing it.
- Knead the dough thoroughly to develop the gluten, which will give the bread its structure and chewiness.
- Allow the dough to rise in a warm, draft-free area to ensure it doubles in size for the best texture.
- Roll the dough as thinly as possible for the classic Lavash texture.
- Puncture the surface of the dough to prevent large bubbles from forming during baking.
Serving Suggestions
Lavash can be served in numerous ways:
- As a wrap for sandwiches or kebabs.
- Lightly toasted as a base for appetizers.
- Softened with water and served alongside soups and stews.
- Broken into pieces and used as a scoop for dips and spreads.
Cooking Techniques
The traditional method of baking Lavash in a tonir can be mimicked by using a hot oven and a baking stone or inverted baking sheet. This technique provides the high heat necessary to cook the bread quickly and evenly.
Ingredient Substitutions
Yeast: Instant yeast can be used instead of active dry yeast; adjust the proofing time accordingly.
- Sugar: Honey or maple syrup can be used as natural sweeteners in place of sugar.
- Flour: For a gluten-free version, use a gluten-free all-purpose flour blend designed for bread baking.
Make Ahead Tips
Lavash dough can be made ahead and stored in the refrigerator for up to 24 hours before baking. Allow the dough to come to room temperature and proceed with the final rise before rolling and baking.
Presentation Ideas
Serve Lavash in a bread basket lined with a clean kitchen towel to keep it warm. For a decorative touch, roll or fold the Lavash in creative ways to enhance your table setting.
Pairing Recommendations
Lavash pairs well with a variety of foods, including:
- Hummus and other Middle Eastern dips.
- Grilled meats and vegetables.
- Fresh salads and cheeses.
Storage and Reheating Instructions
Store leftover Lavash in an airtight container at room temperature for up to 2 days. To reheat, sprinkle with water and warm in a 350°F (175°C) oven for a few minutes until soft and pliable.
Nutrition Information
Calories per serving
A single serving of Lavash, which is roughly one-eighth of the recipe, contains approximately 180 calories. This makes it a relatively low-calorie option for bread, especially when considering its size and versatility.
Carbohydrates
A serving of Lavash bread primarily provides carbohydrates. The exact amount can vary, but on average, a piece of Lavash (about 60 grams) contains approximately 33 grams of carbohydrates. This makes it a good source of energy, especially when paired with other nutrient-dense foods.
Fats
Lavash is a low-fat bread, with a single serving containing less than 1 gram of fat. This makes it an excellent choice for those monitoring their fat intake or looking for a lighter bread option.
Proteins
Lavash provides a modest amount of protein, with a single serving containing about 5 grams. While not a high-protein food, it can contribute to the daily protein intake, especially when combined with other protein sources.
Vitamins and minerals
Lavash contains several vitamins and minerals, including B vitamins, iron, and selenium. The exact amounts can vary depending on the flour used and the addition of any fortified ingredients.
Alergens
The primary allergen in Lavash is gluten, which is found in the all-purpose flour used in the recipe. Those with gluten sensitivities or celiac disease should avoid traditional Lavash but can look for gluten-free alternatives.
Summary
Overall, Lavash is a nutritious bread option that provides carbohydrates for energy, a low amount of fat, a moderate amount of protein, and various vitamins and minerals. It is, however, important to be mindful of gluten content for those with sensitivities.
Summary
This basic Lavash recipe offers a delicious and versatile bread that complements a wide range of dishes. With its rich history and simple ingredients, Lavash is a testament to the beauty of traditional baking. Whether you're serving it as part of a meal or using it as a base for creative appetizers, Lavash is sure to impress with its soft texture and delicious flavor.
How did I get this recipe?
I can't forget the moment I stumbled upon this recipe for Basic Lavash. It was a warm summer day, and I was visiting my friend Sarah's house for a get-together. As soon as I walked into her kitchen, I was hit with the most amazing aroma. Sarah was busy rolling out dough and baking these thin, crispy flatbreads that looked absolutely delicious.
I watched in awe as she effortlessly stretched and shaped the dough, then baked it in her hot oven until it puffed up and turned a beautiful golden brown. When she offered me a piece to try, I was blown away by the flavor and texture. It was unlike anything I had ever tasted before.
I begged Sarah to teach me how to make the Basic Lavash, and she graciously agreed. She showed me step by step how to mix the simple ingredients together, knead the dough until it was smooth and elastic, then roll it out into thin sheets. She explained that the key to getting the perfect texture was to bake the lavash in a hot oven for just a few minutes, until it puffed up and became crisp.
I practiced making the Basic Lavash over and over again, each time tweaking the recipe to suit my own tastes. I added a touch of garlic powder for extra flavor, and a sprinkle of sesame seeds for a bit of crunch. I experimented with different flours and found that a combination of whole wheat and all-purpose flour gave the lavash a nutty, rich flavor that I loved.
As I continued to perfect my recipe, I shared it with friends and family who were all equally impressed. They couldn't believe that I had mastered such a seemingly complex dish in such a short amount of time. But I knew that it was all thanks to Sarah and her willingness to share her knowledge with me.
Over the years, I have made Basic Lavash for countless gatherings and events. It has become my signature dish, and whenever I bring a batch to a party, it is always the first thing to disappear. I love watching the faces of my friends and family light up as they bite into the crispy, flavorful flatbread, knowing that I created something truly special.
I am grateful to Sarah for introducing me to the world of Basic Lavash and for inspiring me to experiment and create my own variations. I never would have imagined that a chance encounter in a friend's kitchen would lead me to discover such a delicious and versatile recipe. But I am so glad that it did, and I will continue to make Basic Lavash for years to come, sharing the joy and satisfaction of creating something truly homemade with those I love.