Homemade Pita Bread
Egyptian Homemade Pita Bread Recipe with All-Purpose Flour and Olive Oil
Introduction
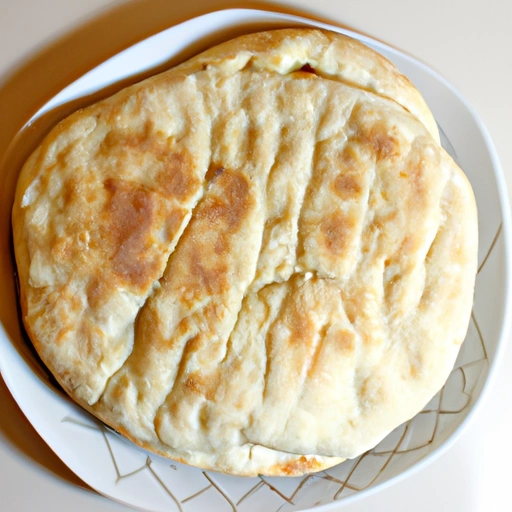
Pita bread is a versatile and delicious bread that can be enjoyed on its own or used to make sandwiches, wraps, and even pizzas. This homemade version is easy to make and tastes much better than store-bought pita bread.
History
Pita bread has been a staple in Middle Eastern cuisine for centuries. It is believed to have originated in ancient Mesopotamia, where it was cooked on hot stones. The word "pita" actually means "pie" or "cake" in Greek, which reflects the round shape of the bread.
Ingredients
How to prepare
- 1. In a small bowl, combine the yeast and sugar. Add 0.5 cup of warm water and let it stand for 10 minutes to proof and ferment.
- 2. Dissolve the salt in the remaining warm water.
- 3. In a large mixing bowl, put the flour and make a well in the middle. Pour the dissolved yeast and salt water into the well.
- 4. Blend the ingredients into a dough using your hands.
- 5. Adjust the amount of water as needed, depending on the consistency of the flour.
- 6. Knead the dough in the bowl with your fists for 10–15 minutes, or until it becomes smooth.
- 7. Pour the oil over the dough and knead it again until the oil is absorbed.
- 8. Cover the dough in the bowl with a towel and let it rise in a draft-free area until it doubles in size (1–2 hours). Then, punch it down and knead it again for a few minutes.
- 9. Preheat your oven to 350°F (177°C).
- 10. Cut pieces of dough, about the size of an egg or larger depending on the desired size of the pita. Shape them into balls with your hands and roll them out on a lightly floured board or pastry cloth to a thickness of 0.25 inches.
- 11. Place 2 or 3 pitas on a lightly oiled cookie sheet and bake them on the lower rack for 2 to 3 minutes on each side.
- 12. The pitas should be white and soft.
- 13. Wrap the baked pitas in a clean towel until they cool, then store them in plastic bags to prevent them from drying out.
- 14. When you are ready to use them, heat a bit of oil in a shallow skillet and fry each pita for about a minute on each side, or until they turn golden brown.
- 15. Use the pitas immediately, as they become hard when they dry out.
Variations
- Add herbs or spices to the dough for extra flavor.
- Use whole wheat flour for a healthier version of pita bread.
- Stuff the pita bread with falafel, grilled vegetables, or shredded chicken for a tasty meal.
Cooking Tips & Tricks
Make sure to let the yeast proof and ferment properly to ensure that the pita bread rises and has a light and fluffy texture.
- Kneading the dough is key to developing the gluten and creating a smooth and elastic dough.
- Rolling out the dough to an even thickness will ensure that the pita bread cooks evenly and puffs up in the oven.
- Store the baked pita bread in plastic bags to keep them fresh and prevent them from drying out.
Serving Suggestions
Serve the homemade pita bread with hummus, tzatziki, or your favorite sandwich fillings.
Cooking Techniques
Proofing the yeast
- Kneading the dough
- Rolling out the dough
- Baking the pita bread
Ingredient Substitutions
Whole wheat flour can be used instead of white all-purpose flour.
- Honey can be used instead of sugar.
- Vegetable oil can be used instead of olive oil.
Make Ahead Tips
The dough can be made ahead of time and stored in the refrigerator for up to 24 hours before baking.
Presentation Ideas
Serve the homemade pita bread on a platter with a variety of dips and fillings for a beautiful and delicious spread.
Pairing Recommendations
Homemade pita bread pairs well with Mediterranean dishes such as falafel, tabbouleh, and grilled meats.
Storage and Reheating Instructions
Store the baked pita bread in plastic bags at room temperature for up to 3 days. To reheat, warm the pita bread in a skillet or in the oven until heated through.
Nutrition Information
Calories per serving
Each serving of homemade pita bread contains approximately 160 calories.
Carbohydrates
Each serving of homemade pita bread contains approximately 30 grams of carbohydrates.
Fats
Each serving of homemade pita bread contains approximately 2 grams of fat.
Proteins
Each serving of homemade pita bread contains approximately 6 grams of protein.
Vitamins and minerals
Homemade pita bread is a good source of iron, magnesium, and zinc.
Alergens
This recipe contains gluten from the flour. It may also contain traces of soy if the yeast used contains soy.
Summary
Homemade pita bread is a nutritious and delicious bread that is a good source of carbohydrates, protein, and essential vitamins and minerals.
Summary
Homemade pita bread is a delicious and versatile bread that is easy to make at home. With a few simple ingredients and some basic cooking techniques, you can enjoy fresh and flavorful pita bread whenever you like.
How did I get this recipe?
I have a clear memory of the first time I saw this recipe for Homemade Pita Bread. It was many years ago, when I was just a young girl living in a small village in Greece. My grandmother, who was known for her incredible cooking skills, had invited me into the kitchen to help her with dinner preparations.
As I watched her expertly knead the dough, I asked her where she had learned to make such delicious bread. She smiled and told me the story of how she had acquired the recipe from an old friend who had lived in the village for many years.
The friend, a kind and generous woman named Maria, had come from a long line of bakers and had learned the art of making pita bread from her mother and grandmother. She had graciously shared her family recipe with my grandmother, who in turn had passed it down to me.
Maria's recipe was simple but required patience and skill. The key, she said, was to let the dough rise slowly and to bake the bread in a hot oven until it puffed up and formed a pocket in the center. This pocket was perfect for filling with all sorts of delicious things, like hummus, falafel, or grilled vegetables.
I watched intently as my grandmother worked the dough, her hands moving with precision and grace. She showed me how to shape the dough into small balls and then roll them out into thin circles. I helped her place the circles onto a hot griddle, where they cooked until they puffed up and turned golden brown.
The smell of fresh bread filled the kitchen, and I couldn't wait to taste the final product. When the pitas were done, my grandmother pulled them out of the oven and handed me one to try. I eagerly tore off a piece and stuffed it with some homemade tzatziki sauce and grilled chicken. The taste was heavenly – warm and soft, with just the right amount of chewiness.
From that day on, I was hooked. I begged my grandmother to teach me how to make pita bread, and she happily obliged. We spent many hours together in the kitchen, perfecting our technique and experimenting with different fillings and flavors.
Over the years, I have continued to make pita bread using Maria's recipe. It has become a staple in my own kitchen, a dish that I am proud to share with my family and friends. Every time I bake a batch of pitas, I think of my grandmother and the memories we made together in that tiny village kitchen.
The recipe for Homemade Pita Bread has become more than just a way to satisfy hunger – it is a connection to my heritage, a link to the past, and a reminder of the love and care that went into every loaf. I am grateful to Maria for sharing her family recipe with us, and to my grandmother for passing it down to me. Cooking this bread is not just about feeding the body – it is about feeding the soul. And for that, I am forever grateful.