Ukrainian Perogies, for Beginners
Ukrainian Perogies for Beginners Recipe - Vegetarian Food
Introduction
Ukrainian Perogies, also known as varenyky, are a traditional Eastern European dish that consists of dough filled with various savory or sweet fillings. These dumplings are a popular comfort food in Ukraine and are often served at family gatherings and holidays.
History
Perogies have been a staple in Ukrainian cuisine for centuries, with recipes being passed down through generations. The dish is believed to have originated in Eastern Europe and has since spread to other countries with Slavic populations. Perogies are typically served as a main course or side dish and can be filled with ingredients such as potatoes, cheese, meat, or fruit.
Ingredients
- Dough
- 2 cups flour
- 0.5 cup warm milk
- 0.5 cup well mashed potatoes
- 1 tsp salt
- 1 tbsp vegetable oil
- Filling
- 0.5 cup chopped onions
- 0.25 cup butter
- 2-3 cooked mashed potatoes
- 1 cup grated cheddar cheese
- Alternate Filling
- 2-3 cups drained cottage cheese (or use dry curd)
- 0.33 cup chopped fresh dill
- 1 egg
- salt and pepper (taste before adding egg!)
How to prepare
- ---------Dough--------------.
- Mix the dough ingredients together.
- You may need to add more liquid or flour to achieve a soft and somewhat sticky dough.
- Turn the dough onto a floured surface and knead in more flour, just enough to make it easier to handle.
- The dough should be slightly sticky, but avoid over-kneading.
- Place the dough in an oiled bowl.
- Cover and let it rest for 30 minutes.
- --------------Filling-----------
- Cook the onion in butter.
- Mix the cooked onion with potatoes and add cheese while the mixture is still hot.
- If desired, you can substitute Cheez Whiz for the Cheddar cheese.
- Allow the filling to cool before using, you can place it in the fridge.
- If using the alternate filling, simply mix those ingredients together.
- -----------Manufacturing--------
- Set a large pot of water to boil.
- Form walnut-sized balls of the filling.
- Roll out the dough on a floured surface to a fairly thin thickness of 3 mm or 0.125 inch.
- You may need to add flour as you roll to prevent sticking.
- Cut out circles approximately 7.5 centimeters (3 inches) in diameter using a wider-mouthed glass or cutter.
- Press the dough scraps into a ball.
- Place a filling ball in the center of each dough circle.
- If the dough has a less-floury side, keep that side facing up.
- Fold the dough over the filling ball and pinch the edges to form a half circle shape.
- To prevent perogies with "horns", start by pinching at the top ("90-degree mark") of the perogy, then pinch at the 180-degree and 90-degree edges, working up to the 90°F (32°C) mark.
- If desired, you can cheat by smearing water on the filling side of the dough at the edges and keeping your fingers floured when pinching on the non-filling side.
- To prevent perogies from drying out, keep the finished perogies on a floured surface and cover them with a floured clean dishcloth.
- Place several perogies in the boiling water.
- Stir gently once with a slotted spoon.
- Perogies are done when they float for a minute, which should take 2-3 minutes.
- Melt about 0.5 cup of butter or margarine in the microwave.
- Rescue and drain the perogies using the slotted spoon.
- Place the drained perogies in a bowl, drizzle them with some melted butter, and gently shake to distribute the butter.
- Repeat the cooking, draining, and drizzling process with the remaining perogies.
- Platzkies (pronounced "plutch-keys"): The scrap dough is not tender enough to make into perogies, but it can be used to make good "dumplings" by themselves.
- Roll out the scraps to approximately the same thickness as before.
- Add minimal flour and handle the dough as little as possible.
- Try to keep the edges even.
- Cut the dough into strips about 8 cm (3 inches) wide using a knife.
- Cut each strip into several triangles and/or squares.
- Cook the strips in water until they float.
- Repeat the draining and drizzling treatment as with the perogies.
Variations
- Try filling the perogies with sauerkraut, mushrooms, or a sweet fruit filling like cherries or blueberries.
- For a healthier twist, use whole wheat flour in the dough and incorporate more vegetables into the filling.
Cooking Tips & Tricks
Be sure to let the dough rest for at least 30 minutes before rolling it out. This will make it easier to work with and will result in a more tender perogy.
- When forming the perogies, make sure to seal the edges tightly to prevent the filling from leaking out during cooking.
- To prevent the perogies from sticking together, place them on a floured surface and cover them with a clean dishcloth until ready to cook.
- For a crispy texture, you can pan-fry the cooked perogies in butter after boiling them.
Serving Suggestions
Ukrainian Perogies can be served as a main course with a side of sour cream or applesauce. They can also be enjoyed as a side dish alongside a salad or soup.
Cooking Techniques
Boiling is the traditional method for cooking perogies, but they can also be pan-fried or baked for a different texture.
Ingredient Substitutions
Instead of potatoes, you can use sweet potatoes or butternut squash in the filling.
- For a dairy-free option, use vegan cheese and plant-based butter in the recipe.
Make Ahead Tips
You can prepare the perogies in advance and freeze them before cooking. Simply place the assembled perogies on a baking sheet and freeze until solid, then transfer to a freezer-safe bag or container.
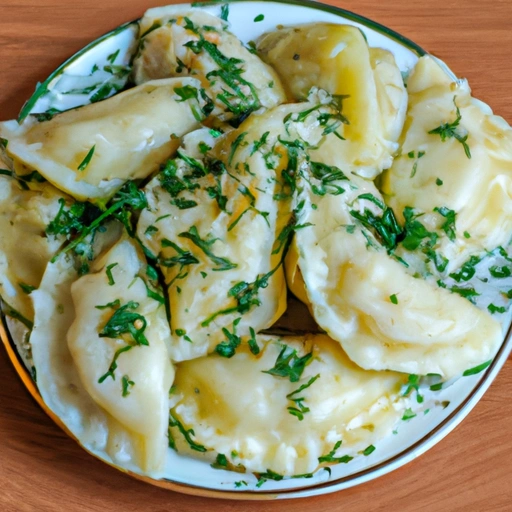
Presentation Ideas
Serve the cooked perogies on a platter garnished with fresh herbs like parsley or dill. You can also drizzle them with additional melted butter for a glossy finish.
Pairing Recommendations
Ukrainian Perogies pair well with a crisp green salad, pickled vegetables, or a hearty borscht soup. They can also be enjoyed with a glass of cold kvass or a shot of vodka.
Storage and Reheating Instructions
Leftover perogies can be stored in an airtight container in the refrigerator for up to 3 days. To reheat, simply boil or pan-fry the perogies until heated through.
Nutrition Information
Calories per serving
On average, one serving of Ukrainian Perogies can contain around 200-300 calories, depending on the size and filling of the dumplings.
Carbohydrates
Per serving, Ukrainian Perogies typically contain around 30-40 grams of carbohydrates, primarily from the dough and filling ingredients.
Fats
Each serving of Ukrainian Perogies can contain approximately 10-15 grams of fat, depending on the type and amount of butter or oil used in the recipe.
Proteins
Perogies can provide around 5-10 grams of protein per serving, with the main sources being cheese, potatoes, and any meat fillings.
Vitamins and minerals
Ukrainian Perogies are a good source of vitamin C, potassium, and calcium, especially if filled with ingredients like potatoes and cheese.
Alergens
Common allergens in Ukrainian Perogies include wheat (gluten) in the dough and dairy in the cheese and butter. Meat fillings may also contain allergens like soy or nuts.
Summary
Overall, Ukrainian Perogies are a balanced dish that provides a mix of carbohydrates, fats, proteins, and essential vitamins and minerals. However, they should be enjoyed in moderation due to their calorie and fat content.
Summary
Ukrainian Perogies are a delicious and versatile dish that can be customized with a variety of fillings. Whether enjoyed as a main course or side dish, these dumplings are sure to be a hit at any gathering. With a little practice, even beginners can master the art of making homemade perogies and impress their friends and family with this classic Ukrainian recipe.
How did I get this recipe?
I remember the sense of anticipation I felt when I first discovered this recipe for Ukrainian Perogies. It was many years ago, when I was just a young girl living in a small village in Ukraine. My grandmother, who was a wonderful cook, had been making perogies for as long as I could remember. I would watch her in the kitchen, marveling at how she effortlessly rolled out the dough, filled it with delicious fillings, and then sealed them up into perfect little pockets of goodness.
One day, I finally mustered up the courage to ask my grandmother to teach me how to make perogies. She smiled warmly and agreed, telling me that it was time for me to learn the family recipe that had been passed down through generations. I was thrilled at the prospect of learning how to make such a beloved dish.
We started by making the dough, mixing flour, eggs, water, and a pinch of salt together until it formed a smooth, elastic ball. My grandmother showed me how to roll out the dough into a thin sheet, then use a round cutter to cut out circles for the perogies. She then taught me how to make the filling, a simple mixture of potatoes, cheese, and onions that was both hearty and flavorful.
Next came the most challenging part - sealing up the perogies. My grandmother showed me how to spoon a small amount of filling onto each dough circle, then fold it over and press the edges together to create a tight seal. It took me a few tries to get the hang of it, but soon I was making perogies with the same skill and precision as my grandmother.
After all the perogies were filled and sealed, my grandmother boiled them in a pot of salted water until they floated to the top, then fried them in butter until they were golden brown and crispy. The smell of the perogies cooking filled the kitchen, making my mouth water in anticipation of the delicious meal to come.
When the perogies were finally ready, my grandmother and I sat down at the table to enjoy our hard work. The first bite was pure heaven - the dough was tender and flaky, the filling creamy and comforting. I savored each bite, knowing that I had finally mastered the art of making Ukrainian Perogies.
As the years went by, I continued to make perogies for my own family, passing down the recipe and technique that my grandmother had taught me. Each time I make them, I am transported back to that little village kitchen, watching my grandmother work her magic with such grace and skill.
Now, as I share this recipe for Ukrainian Perogies for Beginners with you, I hope that you will feel the same sense of anticipation and joy that I did when I first discovered it. May you make these perogies with love and care, knowing that you are carrying on a tradition that has been cherished for generations. Enjoy!
Categories
| Cheddar Recipes | Cheese Recipes | Cottage Cheese Recipes | Czech Recipes | Czech Vegetarian | Dill Recipes | Potato Recipes | Ukrainian Recipes | Vegetarian Recipes |