Jell-O Self-layering Dessert
Jell-O Self-layering Dessert Recipe - Delicious & Easy American Treat
Introduction
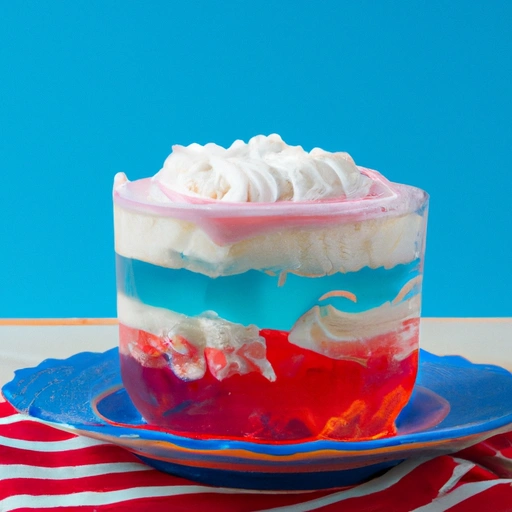
Jell-O Self-layering Dessert is a fun and easy-to-make treat that is perfect for any occasion. This colorful and delicious dessert is sure to impress your family and friends with its unique layered look.
History
Jell-O Self-layering Dessert has been a popular dessert choice for many years. The concept of self-layering desserts originated from the idea of using gelatin to create different layers of flavors and textures in a single dish. This dessert has evolved over time with various flavor combinations and presentation styles.
Ingredients
How to prepare
- Pour boiling water into a blender.
- Add gelatin.
- Cover and blend at low speed until the gelatin is completely dissolved, about 30 seconds.
- Combine cold water and ice cubes to make 1.25 cups.
- Add the mixture to the gelatin and stir until the ice is partially melted.
- Then add whipped topping and blend at high speed for 30 seconds.
- Pour the mixture into dessert glasses.
- Chill for about 30 minutes.
- The dessert will form layers as it chills.
Variations
- Try using different flavors of gelatin for a variety of colorful layers.
- Add fresh fruit or nuts to each layer for added texture and flavor.
Cooking Tips & Tricks
Make sure to dissolve the gelatin completely in the boiling water before adding the cold water and ice cubes.
- Use a blender to ensure that the whipped topping is fully incorporated into the gelatin mixture.
- Chill the dessert glasses in the refrigerator before pouring in the gelatin mixture to help the layers set properly.
Serving Suggestions
Serve Jell-O Self-layering Dessert chilled with a dollop of whipped cream on top for an extra indulgent touch.
Cooking Techniques
Use a blender to ensure that the gelatin is fully dissolved and the whipped topping is well incorporated.
- Chill the dessert glasses before pouring in the gelatin mixture to help the layers set properly.
Ingredient Substitutions
You can use sugar-free gelatin and light whipped topping for a lower calorie version of this dessert.
- Substitute the cold water and ice cubes with fruit juice for a fruity twist.
Make Ahead Tips
Jell-O Self-layering Dessert can be made ahead of time and stored in the refrigerator for up to 2 days before serving.
Presentation Ideas
Serve Jell-O Self-layering Dessert in clear dessert glasses to show off the colorful layers.
Pairing Recommendations
Pair Jell-O Self-layering Dessert with a cup of hot tea or coffee for a light and refreshing dessert experience.
Storage and Reheating Instructions
Store any leftover Jell-O Self-layering Dessert in the refrigerator in an airtight container for up to 2 days. Do not freeze.
Nutrition Information
Calories per serving
Each serving of Jell-O Self-layering Dessert contains approximately 80 calories.
Carbohydrates
Each serving of Jell-O Self-layering Dessert contains approximately 15 grams of carbohydrates.
Fats
Each serving of Jell-O Self-layering Dessert contains approximately 3 grams of fats.
Proteins
Each serving of Jell-O Self-layering Dessert contains approximately 1 gram of proteins.
Vitamins and minerals
Jell-O Self-layering Dessert is not a significant source of vitamins and minerals.
Alergens
Jell-O Self-layering Dessert may contain dairy allergens due to the whipped topping.
Summary
Jell-O Self-layering Dessert is a low-calorie dessert option that is relatively low in carbohydrates and fats. It is a fun and colorful treat that can be enjoyed in moderation.
Summary
Jell-O Self-layering Dessert is a fun and colorful dessert that is easy to make and sure to impress your guests. With its unique layered look and delicious flavor, this dessert is perfect for any occasion. Enjoy this low-calorie treat in moderation for a guilt-free indulgence.
How did I get this recipe?
I recall the feeling of curiosity that overcame me when I found this recipe for Jell-O Self-layering Dessert. It was tucked away in an old cookbook that belonged to my dear friend Agnes, who was known for her delicious desserts. As I flipped through the pages, my eyes landed on the vibrant colors of the layered dessert, each layer perfectly separated and distinct. I knew I had to try making it myself.
I remember the day I first attempted to recreate the Jell-O Self-layering Dessert in my own kitchen. The ingredients were simple – different flavors of Jell-O, some gelatin, sugar, and water. I followed the instructions carefully, mixing each layer and allowing it to set before adding the next. The whole process was a labor of love, but when I finally unmolded the dessert, I was met with a masterpiece of colors and flavors.
As I took my first bite of the Jell-O Self-layering Dessert, I was transported back to my childhood, when my own grandmother would make us sweet treats to enjoy after dinner. The taste was nostalgic, yet somehow new and exciting. I knew that this recipe would become a staple in my own repertoire, a dish to impress guests and bring joy to my loved ones.
Over the years, I have perfected the art of making the Jell-O Self-layering Dessert. I have experimented with different flavor combinations, from classic cherry and lime to more exotic mango and pineapple. Each time I make the dessert, I am reminded of the joy that cooking brings me, the satisfaction of creating something beautiful and delicious from simple ingredients.
One day, as I was preparing the Jell-O Self-layering Dessert for a family gathering, my granddaughter Sarah came into the kitchen, her eyes wide with curiosity. She watched me as I carefully poured each layer into the mold, explaining the process as I went along. I could see the same spark of interest in her eyes that I had felt when I first discovered the recipe.
As the dessert chilled in the refrigerator, Sarah asked me if she could help me make the next batch. I was thrilled at the opportunity to pass down this recipe to her, to share a piece of my culinary heritage with the next generation. Together, we mixed the Jell-O and gelatin, poured the layers into the mold, and waited for the magic to happen.
When we finally unmolded the dessert and saw the vibrant layers shimmering in the light, Sarah squealed with delight. She took a bite, her face lighting up with joy at the explosion of flavors in her mouth. I could see that she had inherited my love for cooking, my passion for creating delicious dishes that bring people together.
As Sarah grew older, she continued to make the Jell-O Self-layering Dessert for family gatherings and special occasions. She added her own twist to the recipe, incorporating new flavors and techniques that she had learned along the way. I watched with pride as she honed her skills in the kitchen, becoming a talented chef in her own right.
Years passed, and I grew older, my hands no longer as steady as they once were. But I knew that the tradition of making the Jell-O Self-layering Dessert would live on through Sarah, passed down from generation to generation. And as I sat at the dining table, surrounded by my loved ones, enjoying a slice of the colorful dessert that had brought us all together, I knew that the recipe would always hold a special place in our hearts.
Categories
| American Recipes | Cathy's Recipes | Dessert Recipes | Gelatin Dessert Mix Recipes | Nondairy Topping Recipes |